Here are the details:
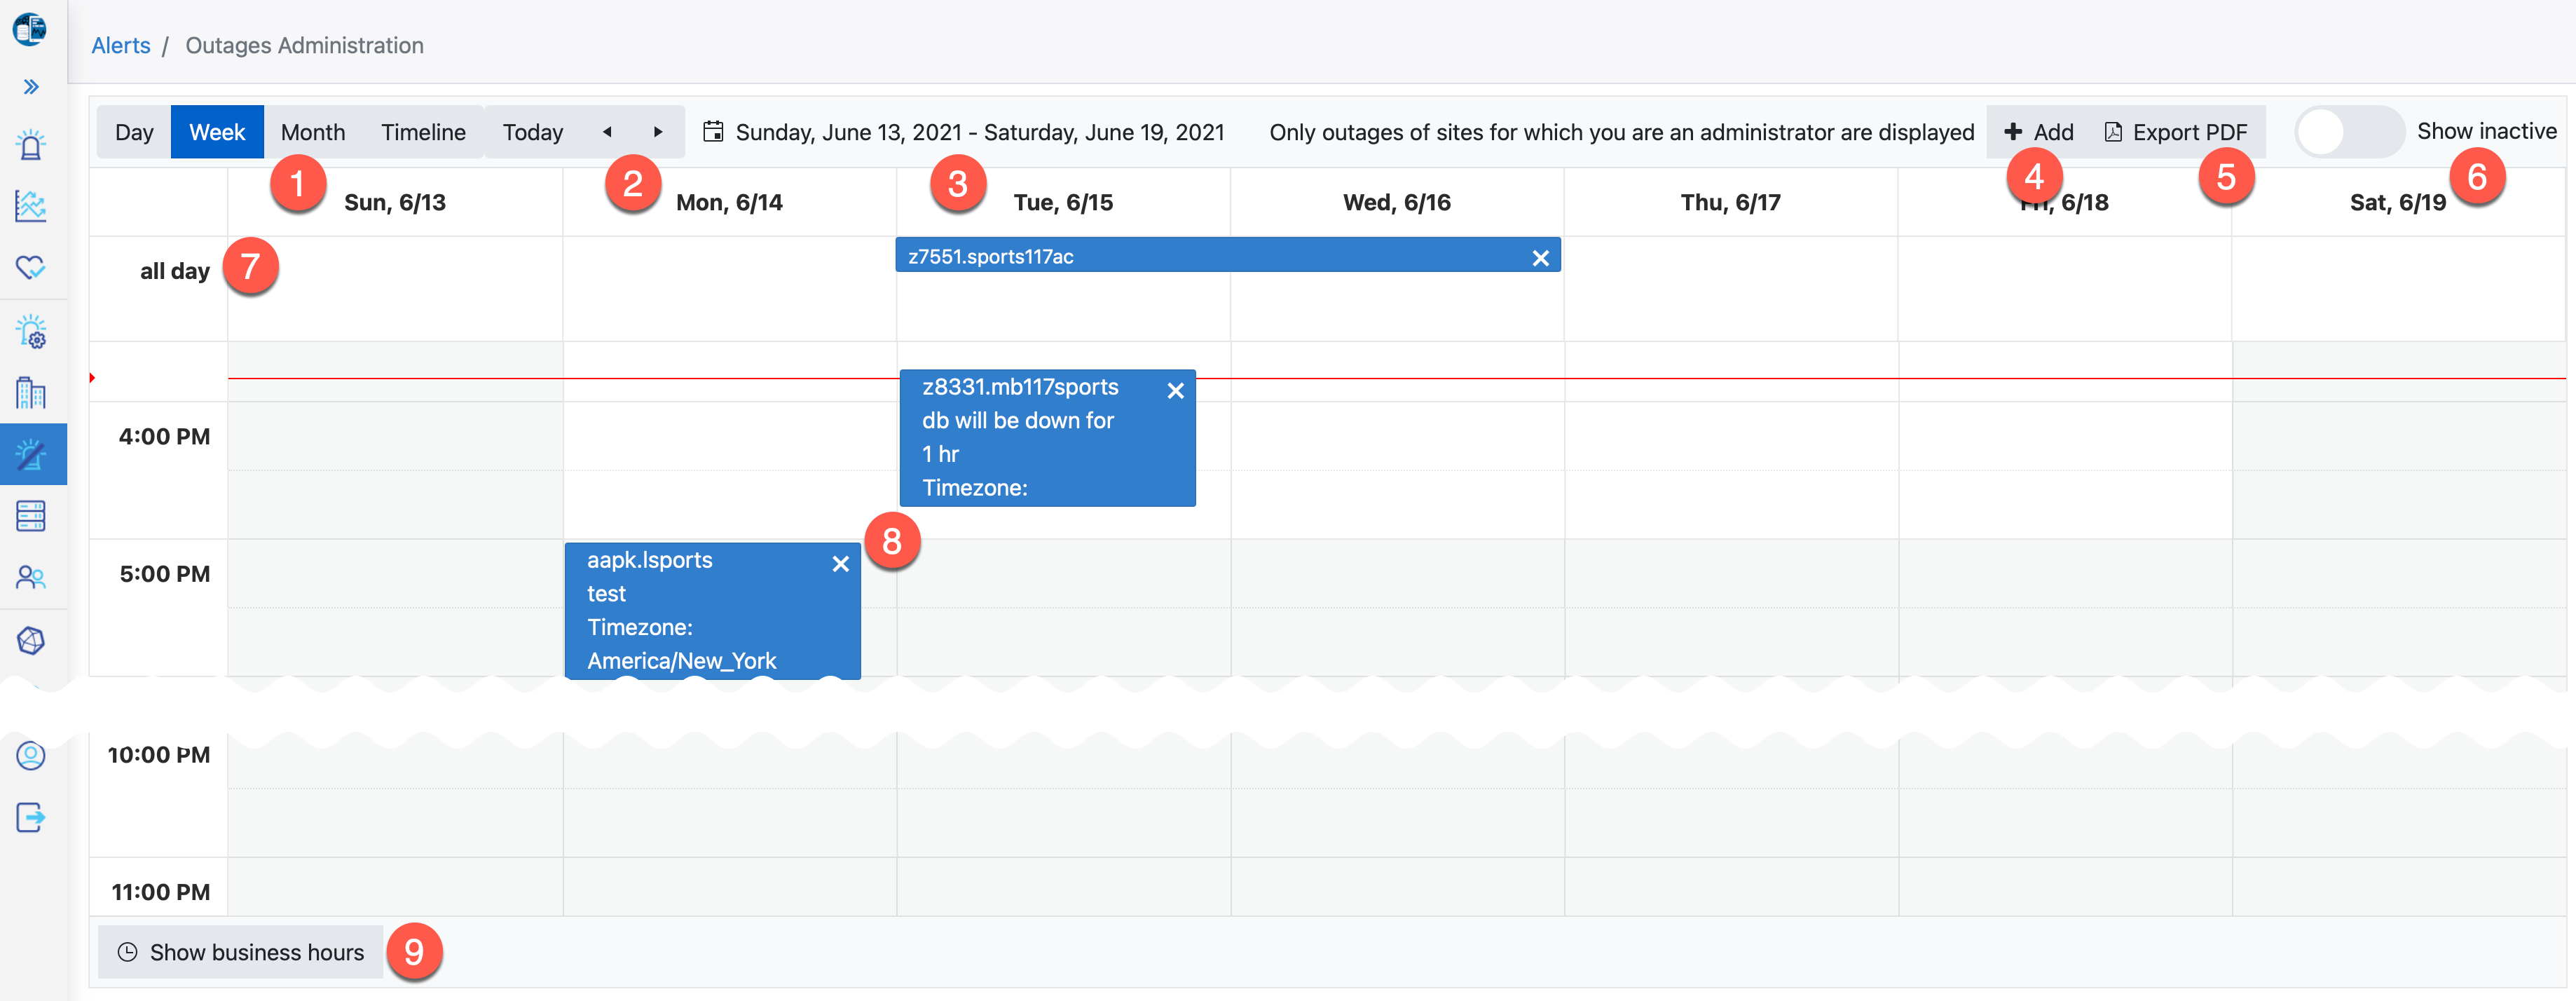
| Number | Feature | Description |
| 1 | Time period | Allows users to select the range of time period displayed |
| 2 | < > | Allows users to select the previous/next time period displayed |
| 3 | Description of the time period currently displayed | |
| 4 | + Add | Use this to Schedule an Outage (details below) |
| 5 | Export PDF | Button to generate a PDF file of the time period currently displayed |
| 6 | Show inactive | Button to toggle the display of outages marked as inactive |
| 7 | All Day | This row shows day-long outages in Week and Day views |
| 8 | Outage | Typical display of an outage |
| 9 | Show full day | Button to toggle between displaying a full twenty-four hour day or only business hours (08:00 AM - 05:00 PM) |
'X' Inactivate Icon
In the upper right corner of every active Outage entry is an 'x', which will change an active record to inactive. Clicking on this 'x' brings up a popup window asking the user to confirm the change. Once the change is made, the record will only appear if the "Show inactive" toggle (upper right corner of the screen) is enabled.
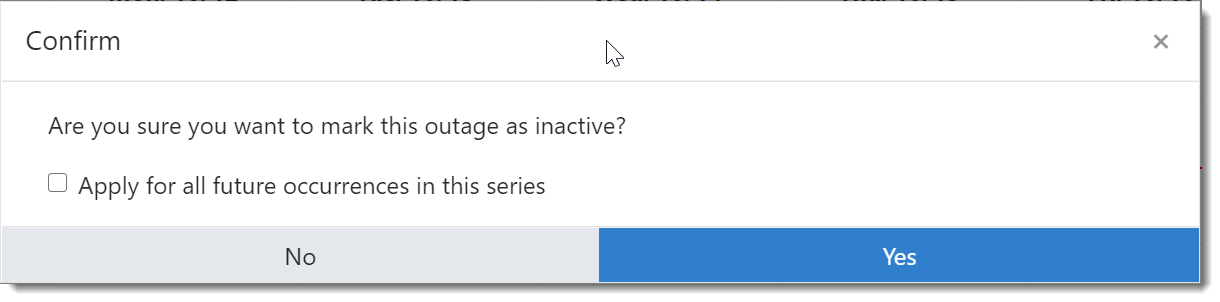
| Field | Description |
| Apply for all future occurrences in this series | If the outage is recurring, also make all future occurrences inactive |
The "Add +" button : Schedule Outage
It allows users to create planned outages. However, only outages of sites for which you are an administrator can be created. Click the add button in the upper right:

And the Schedule Outage form will appear:

Configure your outage using the following fields:
| Field | Description |
| Site | Select the Site name from the dropdown (found in [PROTOPDIR]/etc/custid.cfg) |
| Select All / Clear | Use these buttons to Select All resources or Clear your resource selection |
| Resource (filter) | Scroll up and down and ctrl-click to select individual resources this outage applies to |
| Agent (filter) | Filter resources on the name of the shared agent monitoring this resource |
| Server (filter) | Filter resource by the hostname the resource is running on |
| Type (filter) | Filter resource on the group (aka type) this resource belongs to |
| Start Time | Set the Start Time of the outage manually or use the calendar icon |
| End Time | Set the End Time of the outage |
| Timezone |
The Timezone of the outage. The outage will appear in the calendar relative to your browser's timezone; e.g., A 2 AM Europe/London outage will appear 5 hours earlier in your ET calendar, at 9 PM the day before. |
| Recurrence | How often the outage will occur |
| Description | Your text describing the purpose of the outage |
Click Save in the bottom right, and your outage is created.
Recurring Outages - How do they work? What will I see on the calendar?
Creating a new recurring outage will appear in the Outages Administration calendar on the day and time you defined.
Once the end time of that outage is passed, the Outage worker will propagate two instances of that recurring outage into the future and disable that outage so that it will no longer propagate.
For instance, if you create a weekly outage on Wednesday, 2/13, from 1 AM to 2 AM, and it is now after 2 AM on 2/13, the outage worker will propagate this outage to 2/20 and 2/27, and you will see active outages for this window in the calendar on these dates.
NOTE: The outage worker runs on a rolling two-hour schedule. Propagation will occur within two hours of the end of an active, recurring outage. Only active, recurring, and in the past outages are propagated.
NOTE: During active planned outages, alerts that arrive at the portal will be displayed in bold orange:
The bold orange highlight no longer appears once the outage has passed or is deactivated.